Since it first launched back in 1985, Windows has grown and grown and grown—so now, several decades later, there’s now plenty to explore, beyond the day-to-day running of the operating system.
Take, for example, God Mode. God Mode has been available in several successive versions of Windows right up to Window 11, and refers to a special collection of shortcuts that can lead you just about everywhere in the operating system. If you’re new to it, we’ll introduce it to you here.
There’s also Super God Mode, an enhanced version of God Mode. Together, these utilities can, for instance, take you straight to all your connected Bluetooth devices, or straight to your photos, or straight to the Windows troubleshooter. You can think of these tools as Start menus for advanced users.
How to use God Mode

God Mode doesn’t turn you into a deity, but it does give you quick access to some of the most important parts of Microsoft’s operating system. The list of installed printers, for example, or the accessibility options for making text and images easier to see, or viewing all the devices your computer is connected to over the internet.
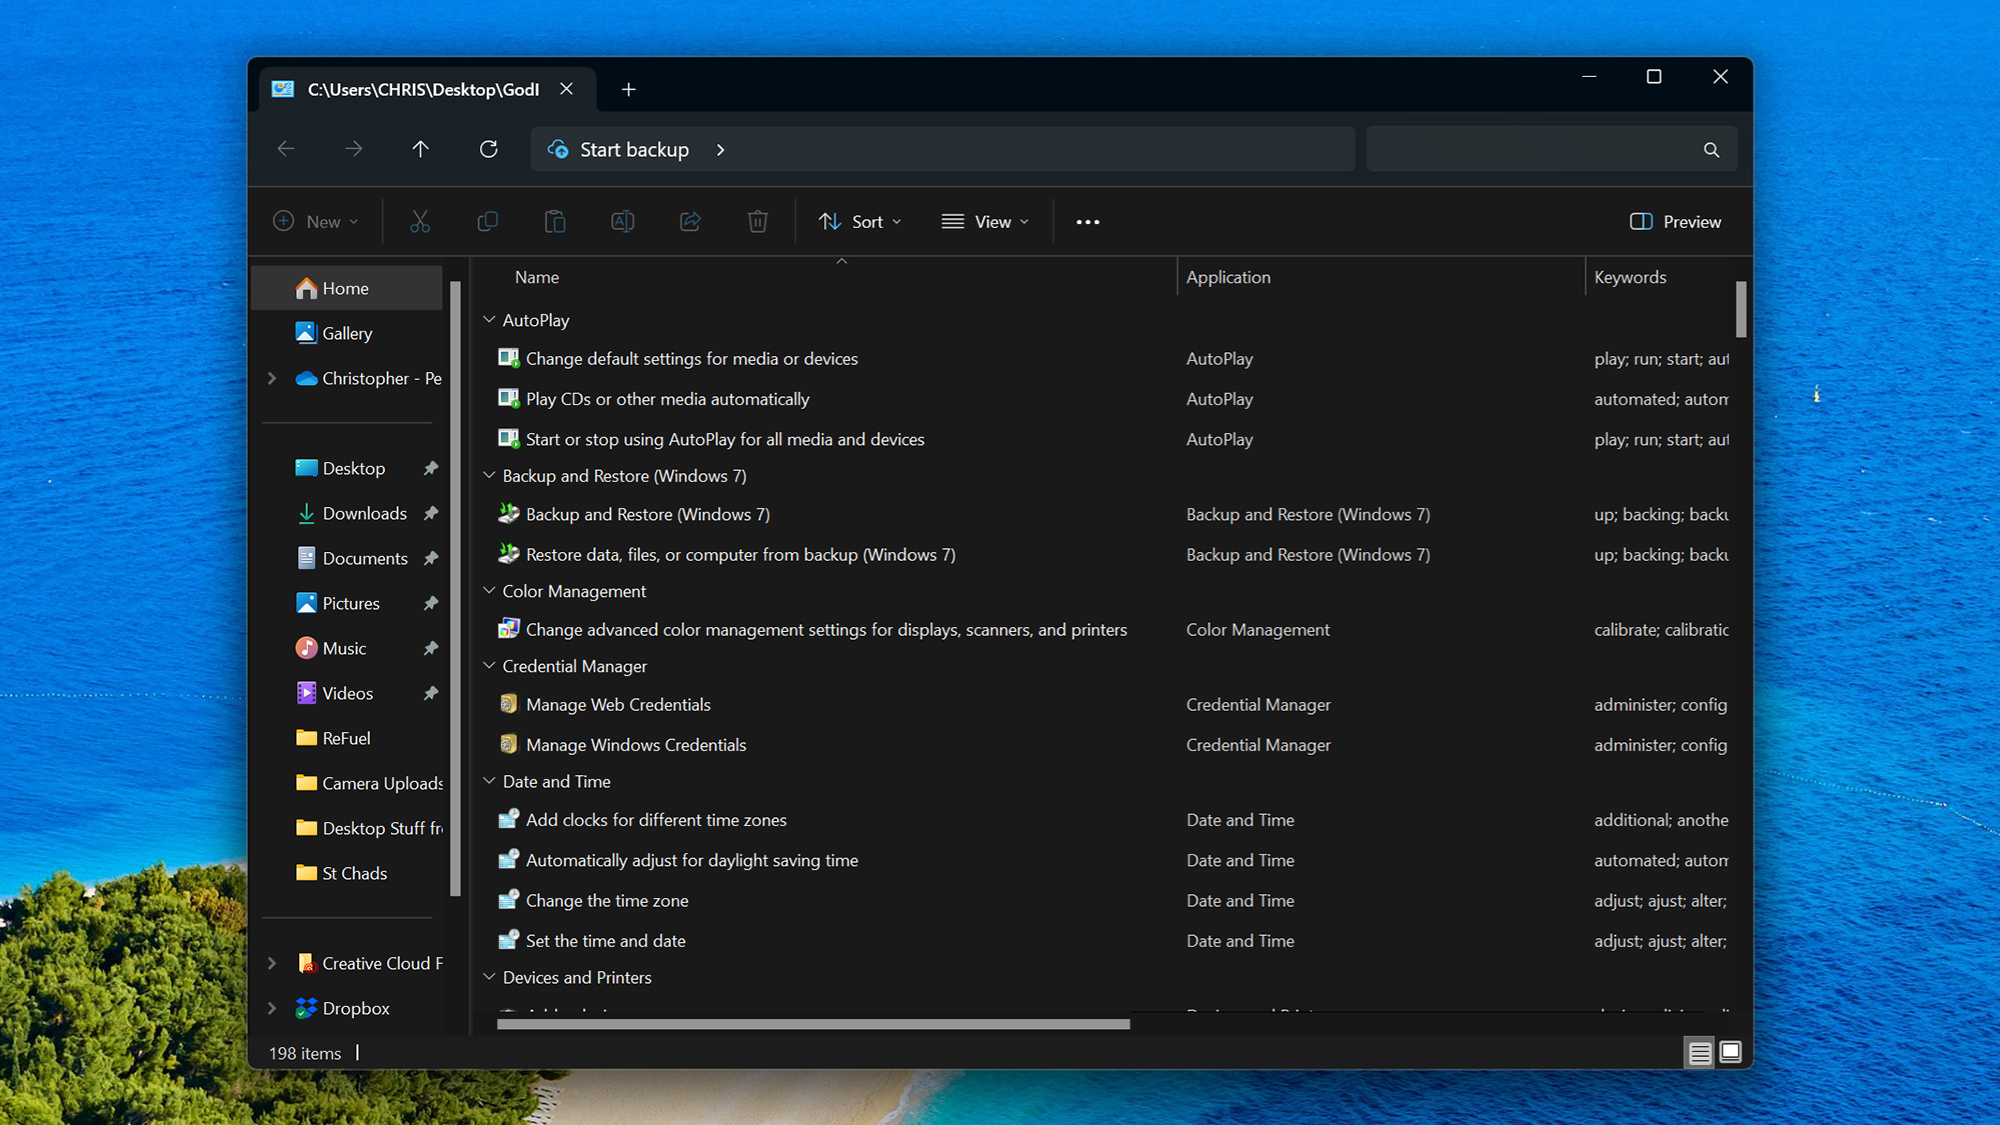
Right-click on a blank area of your desktop, choose New and then Folder, and then rename the folder “GodMode.{ED7BA470-8E54-465E-825C-99712043E01C}” (without the quotation marks). Press Enter to confirm the renaming, and you should see the icon change to look like the old Windows Control Panel icon. Double-click on this new icon to launch the God Mode window.
As you’ll see, this window is a treasure trove of shortcuts to other places on the system (click on the small arrows to expand or collapse any of the sections). You’ll find tools here for freeing up disk space, creating new user accounts, setting up new hardware devices to connect to Windows, and much more.
For example, double-click on the Uninstall a program link to see a full list of applications currently installed on Windows. You can see when each program was installed, the name of its developer, and how much space it’s taking up. If there are programs you no longer need or use, click on them and choose Uninstall.
We don’t have the space here to go through all the different options God Mode gives you, but it’s well worth taking a look at all the menu entries. You don’t need to worry about damaging your system in any way, as this is just a list of shortcuts: If you ever decide you don’t want to use God Mode in the future, simply delete the shortcut from your desktop.
How to use Super God Mode

When you think you’ve mastered God Mode, you can move up a level to Super God Mode. This isn’t a built-in Windows tool, however–it’s a third-party download. To get started, create a folder for the utility, which can be called anything you like and placed anywhere in the system.
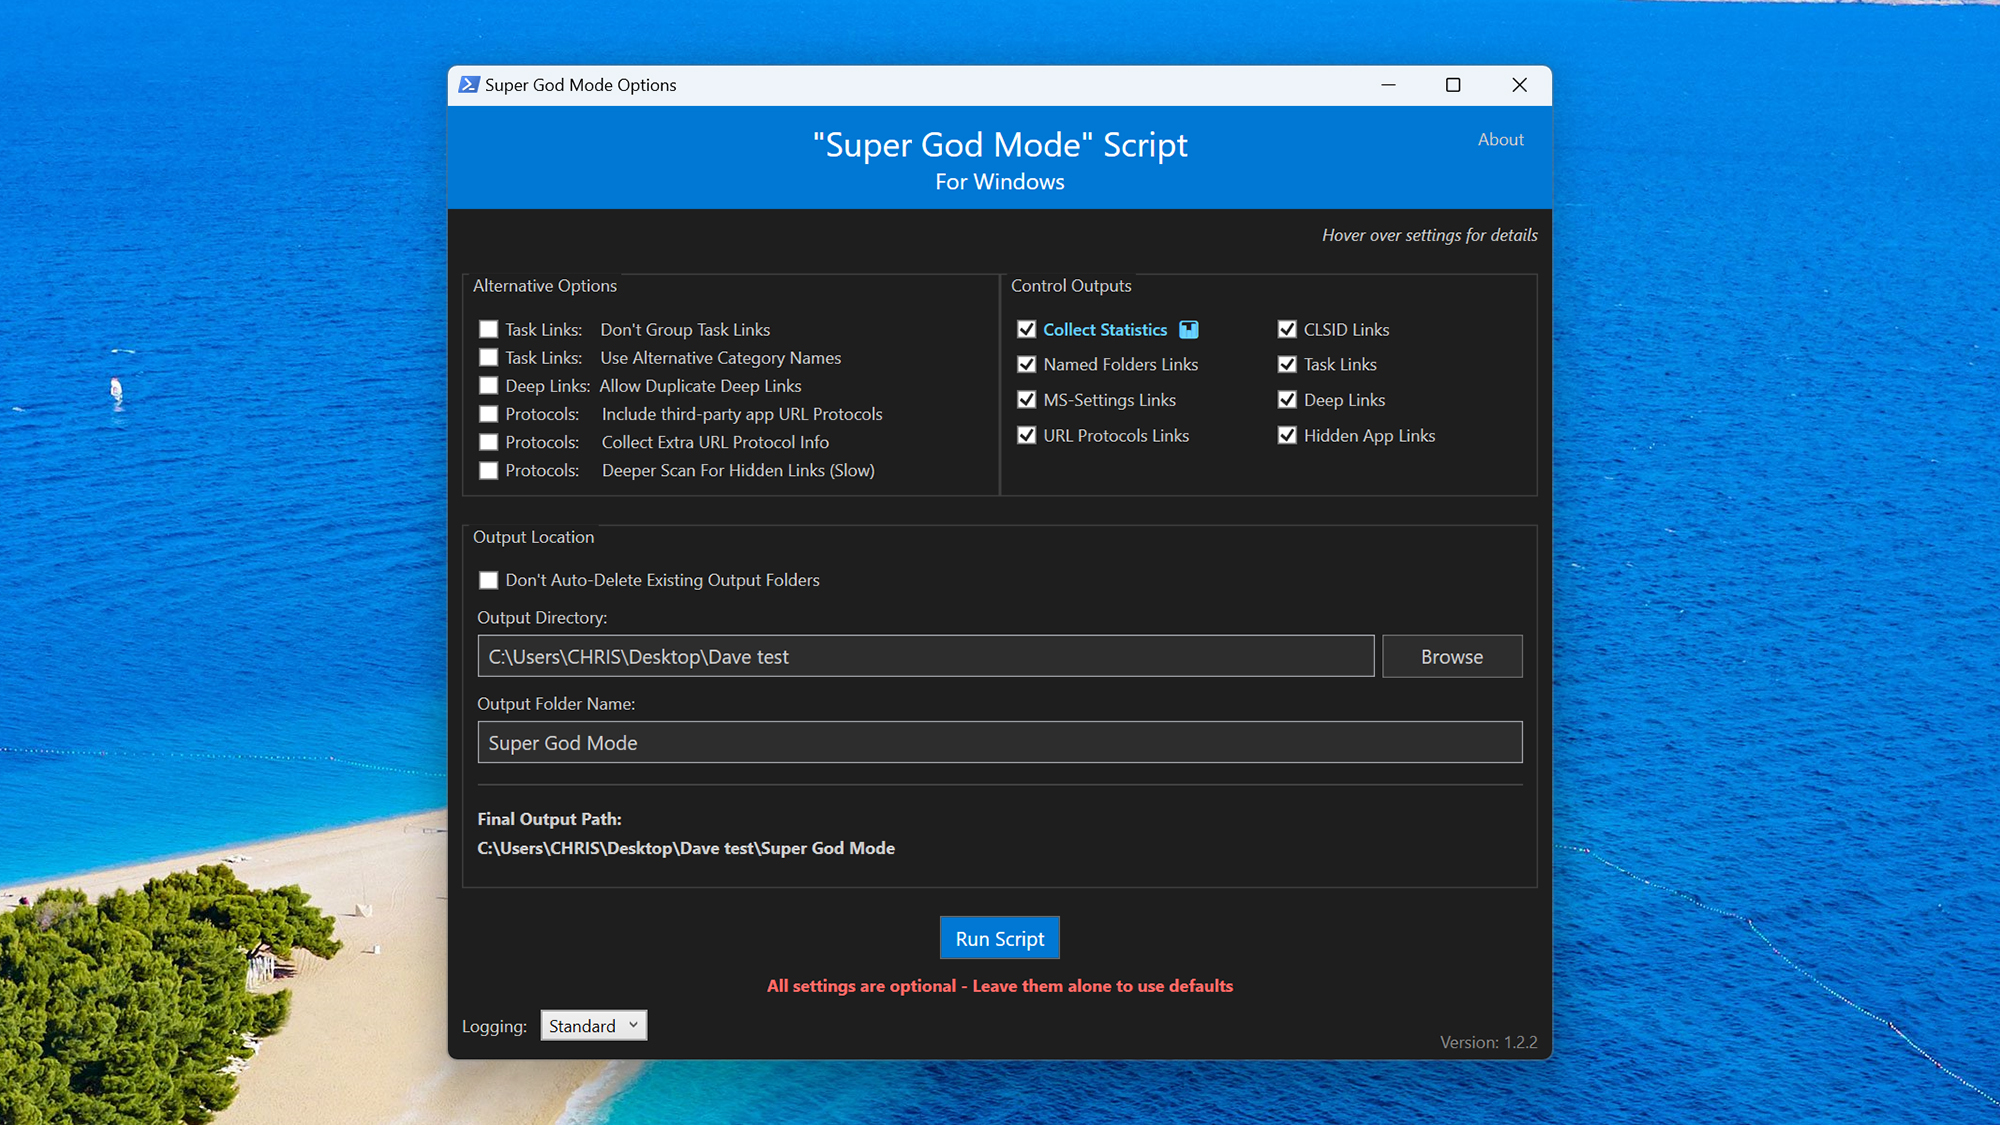
Then, head to this page to download the PS1 and BAT files into the folder you’ve just created. Next, run the BAT file—if you see a security message from Windows, click More info then Run anyway (this is a program you can trust, and its source code is published). You’ll then be met with a collection of options, which let you tweak various aspects of the Super God Mode utility.
Don’t worry if these options don’t mean much — they just control which shortcuts are included in the list, and you can just leave the default settings in place if you want, and click Run Script. After processing, the setup will be complete, and you can close the command prompt window.
With that head back into the folder, and launch the new Super God Mode shortcut. You’ll see how it gets its name: It’s like God Mode, but with a lot more in the way of additional shortcuts. You can jump straight to your contacts, or the music folder in OneDrive, or to the settings that control how your PC wakes up from sleep.
There’s a lot of overlap with God Mode, but there’s a lot that’s extra here as well, and it’ll take you even longer to work through everything. Make sure you have a look at the help file included in the Super God Mode folder, because this will assist with using the utility and explaining how it works. As with God Mode, when you don’t need Super God Mode any more, just delete its folder.

